


Understanding the Installation Process of PE Geomembrane: A Comprehensive Guide
Release time:
2025-11-19
Understanding the Installation Process of PE Geomembrane Table of Contents 1. Introduction to PE Geomembrane 2. What is PE Geomembrane? 3. Applications of PE Geomembrane 4. Pre-Installation Steps 5. The Installation Process 6. Common Installation Techniques 7. Best Practices for Successful Installation 8. Maintenance and Monitoring of Installed Geomembranes 9.
Understanding the Installation Process of PE Geomembrane
Table of Contents
- 1. Introduction to PE Geomembrane
- 2. What is PE Geomembrane?
- 3. Applications of PE Geomembrane
- 4. Pre-Installation Steps
- 5. The Installation Process
- 6. Common Installation Techniques
- 7. Best Practices for Successful Installation
- 8. Maintenance and Monitoring of Installed Geomembranes
- 9. Conclusion
- 10. FAQs
1. Introduction to PE Geomembrane
The construction industry is continuously evolving, with new materials and methodologies emerging to enhance efficiency and sustainability. **PE geomembranes**, made from polyethylene, are among the most versatile materials used in construction and environmental projects today. Understanding their installation process is crucial for ensuring durability and effectiveness in applications ranging from landfill liners to water containment systems.
2. What is PE Geomembrane?
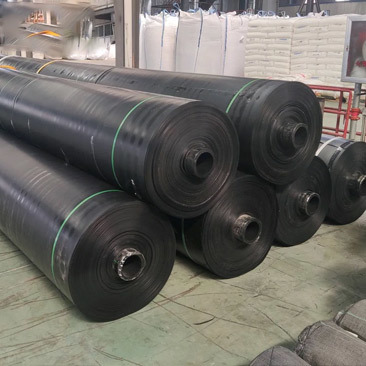
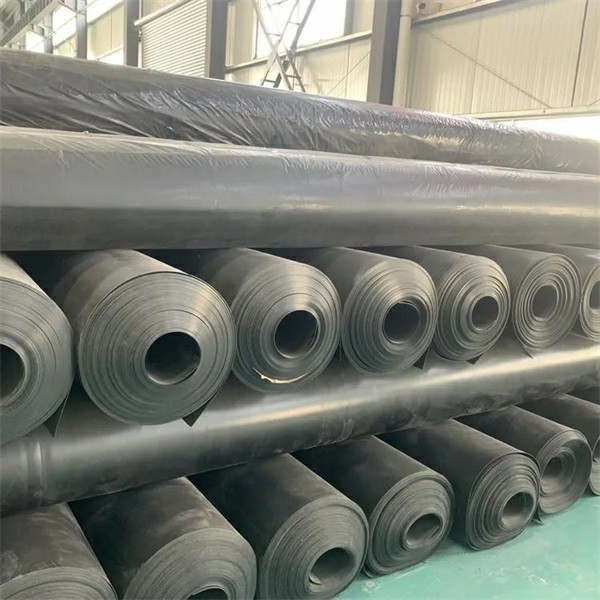
PE geomembrane refers to a type of synthetic membrane liner that provides a barrier to fluid or gas migration in various applications. These membranes are **highly impermeable** and are widely used in waste management, mining, and water conservation projects. Their resistance to environmental stressors makes them an ideal choice for many construction projects, leading to their growing popularity.
Key Properties of PE Geomembrane
When selecting PE geomembranes for installation, it is essential to consider their key properties:
- **High Tensile Strength**: Ensures durability under stress.
- **Chemical Resistance**: Protects against various environmental contaminants.
- **Low Permeability**: Prevents fluid migration effectively.
- **UV Stability**: Prolongs lifespan even in outdoor applications.
3. Applications of PE Geomembrane
PE geomembranes are utilized in a variety of applications, which include but are not limited to:
- **Landfill Liners**: Prevents leachate from contaminating soil and groundwater.
- **Water Reservoirs**: Ensures water storage without loss due to seepage.
- **Mining Operations**: Provides a barrier in tailings ponds and heap leach pads.
- **Agricultural Applications**: Used in irrigation systems and pond liners.
4. Pre-Installation Steps
Before diving into the installation of PE geomembranes, several pre-installation steps must be followed meticulously to guarantee a successful outcome.
Site Assessment
Conducting a comprehensive site assessment is the first step. This involves analyzing the terrain, identifying potential obstacles, and understanding the environmental conditions of the site.
Material Selection
Choosing the right type and thickness of PE geomembrane is crucial. Different applications may require different grades to withstand specific environmental challenges.
Preparation of the Subgrade
The subgrade must be adequately prepared. This includes removing sharp objects, debris, and ensuring a smooth surface to prevent puncturing the geomembrane during installation.
5. The Installation Process
The installation of PE geomembranes is a systematic procedure that requires careful attention to detail.
Step 1: Layout and Positioning
Begin by laying out the geomembrane on the prepared subgrade. Ensure that the material is positioned correctly to cover the intended area without excessive overlap.
Step 2: Joining Sections
If multiple sheets are required, they must be joined properly. There are several methods for joining geomembrane sections, including:
- **Heat Welding**: Uses heat to fuse edges together, creating a strong bond.
- **Adhesive Bonding**: Utilizes specialized adhesives to hold sections together.
Step 3: Securing the Geomembrane
Once positioned and joined, secure the geomembrane in place using anchors or weights to prevent movement due to wind or other environmental factors.
Step 4: Quality Control Checks
Conduct thorough quality control checks throughout the installation process. This includes inspecting seams and ensuring proper placement.
6. Common Installation Techniques
Understanding various installation techniques is vital for ensuring optimal performance.
Trenching
Trenching involves digging a shallow trench around the perimeter of the installation site to secure the geomembrane. This technique is particularly effective for preventing uplift due to wind.
Ballasting
In areas where trenching is not feasible, ballasting with gravel or other materials helps secure the geomembrane in place and provides added stability.
Use of Geotextiles
Integrating geotextiles with geomembranes can enhance durability and filtration, providing an additional layer of protection against environmental factors.
7. Best Practices for Successful Installation
To ensure a successful installation, consider the following best practices:
Regular Inspections
Conduct regular inspections during the installation process to identify any potential issues early. Proper documentation of these inspections will aid in maintaining a record of the installation quality.
Temperature Considerations
Pay attention to temperature during installation. Extreme temperatures can affect the material’s flexibility and bonding effectiveness.
Training Personnel
Ensure that all personnel involved in the installation are adequately trained. Knowledgeable teams are crucial to executing the process efficiently and effectively.
8. Maintenance and Monitoring of Installed Geomembranes
After installation, ongoing maintenance and monitoring are critical to ensure the longevity of the geomembrane.
Routine Inspections
Conduct routine inspections to detect any signs of wear, damage, or potential leaks. Addressing issues promptly can prevent costly repairs in the long run.
Environmental Monitoring
Monitoring the surrounding environment for potential impacts, such as chemical spills or seismic activities, ensures that the geomembrane remains intact and effective.
9. Conclusion
Understanding the installation process of PE geomembranes is essential for any construction professional or project manager. By following the outlined steps and best practices, one can ensure a successful installation that meets the specific needs of various applications. With the right preparation, techniques, and ongoing maintenance, PE geomembranes can significantly contribute to the integrity and sustainability of construction projects.
10. FAQs
What is the lifespan of a PE geomembrane?
The lifespan of a PE geomembrane can vary based on environmental conditions and proper installation but generally ranges from 20 to 50 years.
Can PE geomembranes be repaired?
Yes, repairs can be made using specialized adhesives or by re-welding the damaged sections, depending on the extent of the damage.
What thickness of PE geomembrane should I use?
The thickness depends on the application; typically, ranges from 20 mils to 60 mils for most applications. Always consider local regulations and environmental factors.
Are PE geomembranes environmentally friendly?
PE geomembranes are considered environmentally friendly as they help prevent contamination and promote sustainable waste management practices.
Do I need a professional for installation?
While DIY installation is possible, hiring professionals with experience in geomembrane installation is recommended to ensure proper techniques and quality control are adhered to.
CONTACT US
Address: Shuangyi Road, Lingcheng District, Dezhou City, Shandong Province


GET A DEDICATED QUOTATION